 |
 Home | Webstore Home | Webstore
|
|
Latest News:
OOTP 25 Available
- FHM 10 Available
- OOTP Go! Available
Out of the Park Baseball 25 Buy Now! |

|
|
||||
| ||||
|
|
#21 |
|
Hall Of Famer
Join Date: Apr 2004
Location: Dedham, MA
Posts: 9,746
|
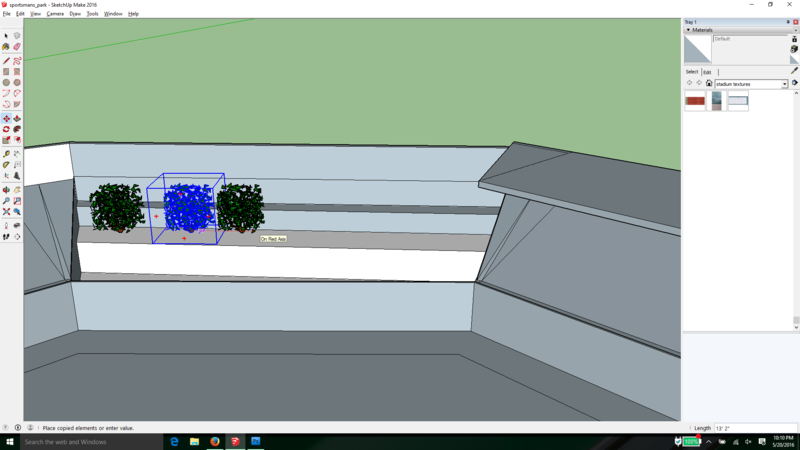
To copy, simply choose the move tool, hover over the shrub and hold the ctrl key and click and drag and there is a copy. place it next to the original, then type 8x and it will make 8 copies accross pretty easy
__________________
Senior "Nancy Boy" of the OOTP Boards _______________________________________________ |
|
|

|
|
|
#22 |
|
Hall Of Famer
Join Date: Apr 2004
Location: Dedham, MA
Posts: 9,746
|
now we have to do the dugouts. to see the location we have to unhide the warning track area. Right click on it and select unhide
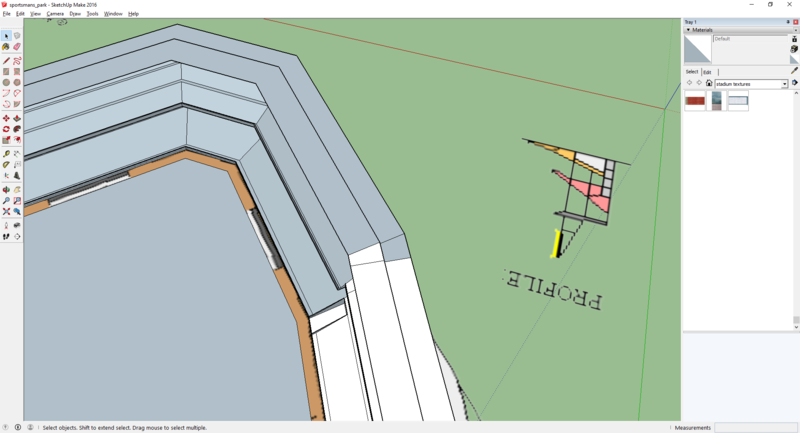 now that you can see the dugout, we are going to draw two lines at each end on the wall and then use push/pull to pull it out over the dugout area 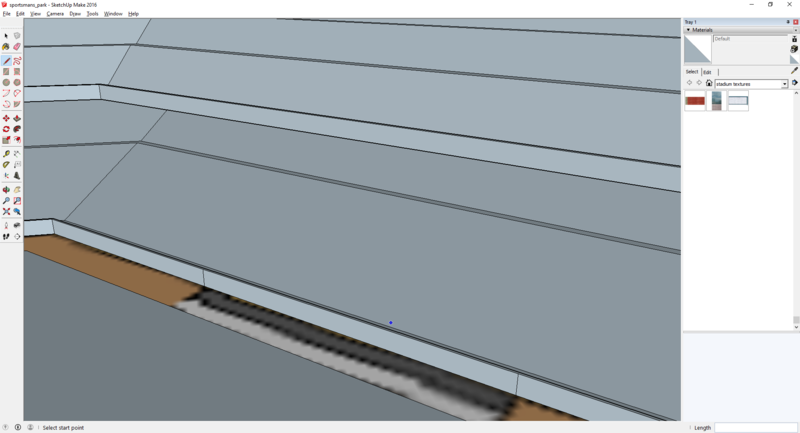 here is the finished product. now just unhide the by going to edit -> unhide -> all 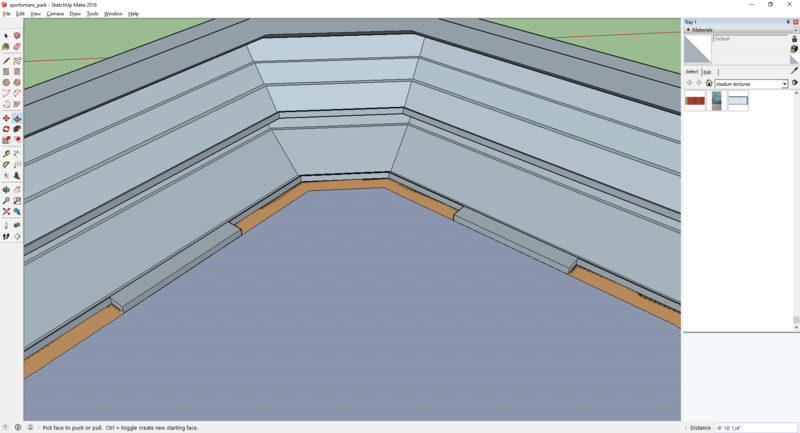 now, we can unhide the field portion to see the warning track around the dugout and use the pen tool to make adjustments 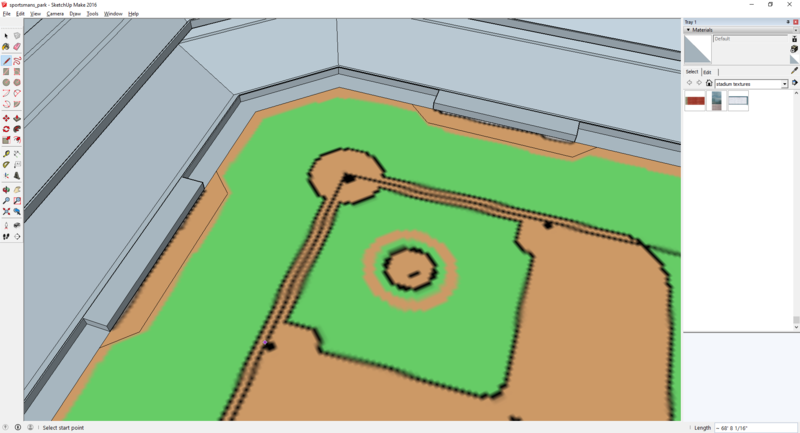 then use the eraser tool to erase the original lines on the warning track 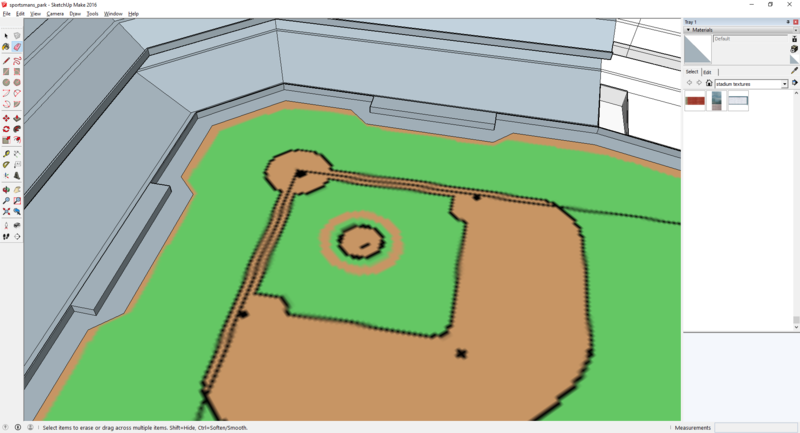
__________________
Senior "Nancy Boy" of the OOTP Boards _______________________________________________ |
|
|

|
|
|
#23 |
|
Hall Of Famer
Join Date: Apr 2004
Location: Dedham, MA
Posts: 9,746
|
next will be painting, placing the infield, and installing the left field scoreboard.
Stay tuned
__________________
Senior "Nancy Boy" of the OOTP Boards _______________________________________________ |
|
|

|
|
|
#24 |
|
Hall Of Famer
Join Date: Apr 2004
Location: Dedham, MA
Posts: 9,746
|
We will now start painting texture on the faces in the park.
I have grown a collection of textures and materials that are ballpark related by looking through the 3d warehouse, downloading others' parks and lifting them by using the eyedropper tool in the materials window (right side of screen) and then saving them as sketchup texture files. 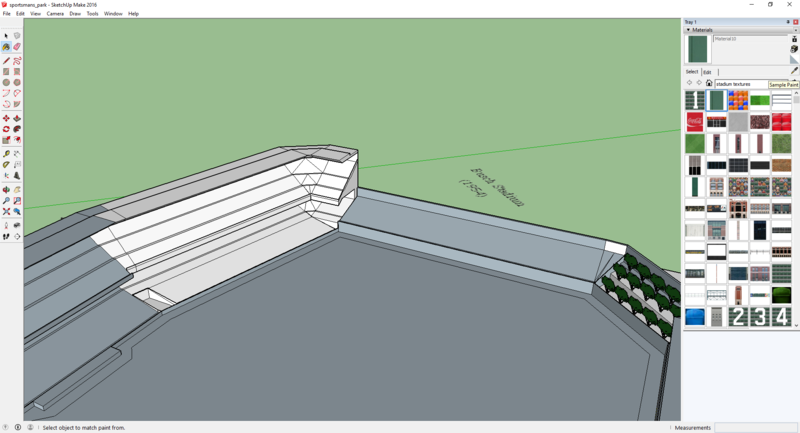 So, painting can be tedious and time consuming and in order for the park to look good in OOTP, every face that is visible needs to have a texture painted on it. By default, there are no textures on the faces, so virtually every face you can see needs to have both sides paiinted,, otherwise it will show as black in OOTP. For this Demo, I will paint the grass, the warning track, and some of the crowd. Painting is as simple as selecting the texture and using the paint bucket tool on a face 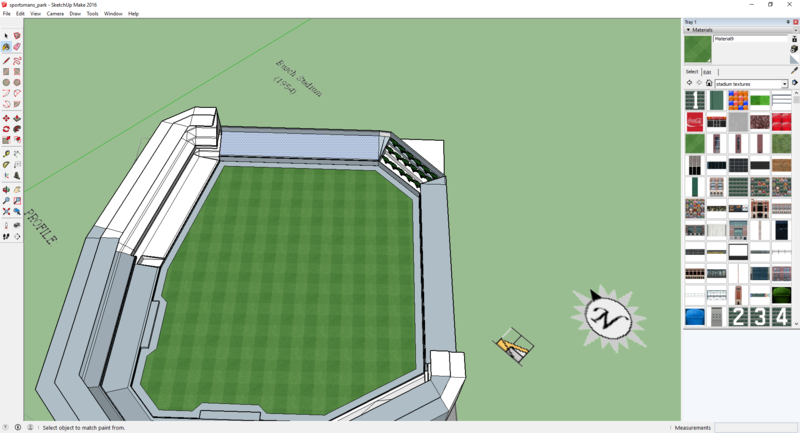 there is grass! now it is important to do the same on the other side of the face, so you have to right click on the face and select "Reverse Faces" this will turn the grass white or gray again. simply use paint bucket on it again. now you should be able to reverse the face and see grass each time 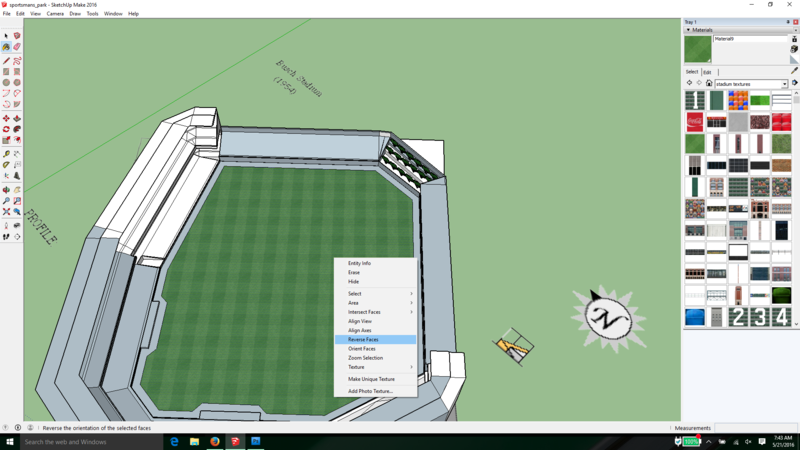 next is the warning track, I usually pick the stock landscaping texture for ground sand smooth again paint it on the track, reverse and paint again. 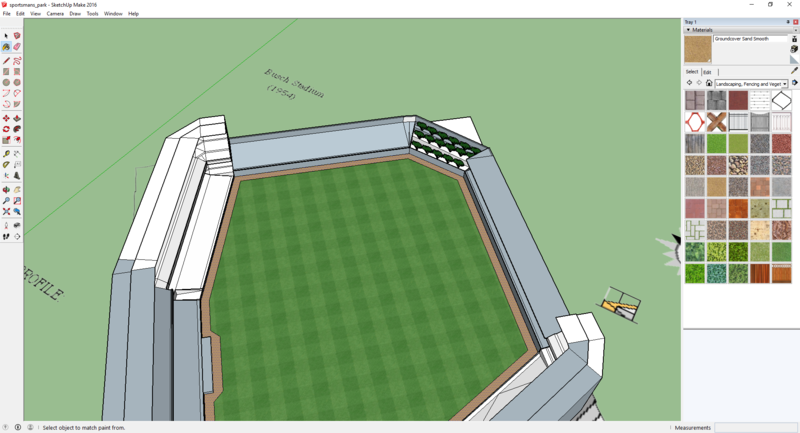 if you want to edit the texture (color or size) you can select the edit tab and choose any color you want or increase and decrease the size 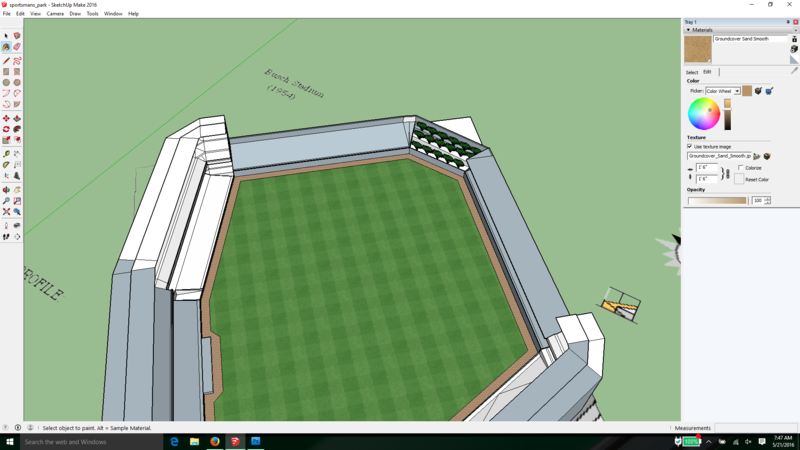 It can be tedious painting each face AND the reverse face each time. one trick if you are painting many faces of the same type is to paint many different faces on the visible side first, then right click on one and choose select -> All with same material and then while all of these faces are selected, right click and reverse faces and all selected will flip. now you can just paint the texture on one face and all will receive that texture (make sure you have the correct texture first before doing this) I used the sparse crowd texture for my example 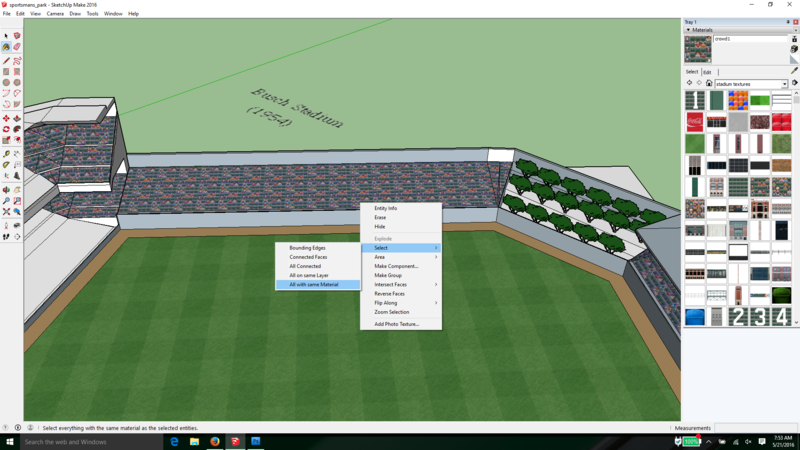 Note* you may need to paint the faces twice when you reverse them depending on what face is facing up the first time that may be confusing but here is a screen showing what I mean after painting once 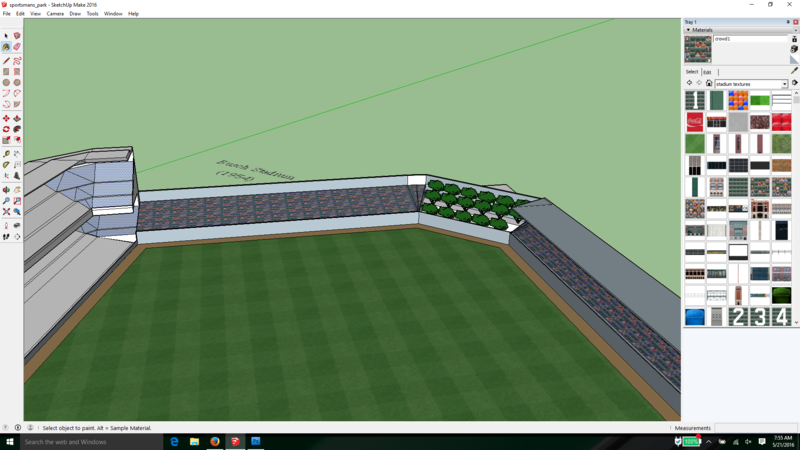 simply paint on the a face in corner grandstand and it should fill in the rest
__________________
Senior "Nancy Boy" of the OOTP Boards _______________________________________________ |
|
|

|
|
|
#25 |
|
Hall Of Famer
Join Date: Apr 2004
Location: Dedham, MA
Posts: 9,746
|
placing the scoreboard in left first requires searching the interwebs for decent picture of the scoreboard. luckily I found a great drawing of it. now you may need to unhide the crowd and the floor below that to see the diagram and draw a box around where the scoreboard is shown
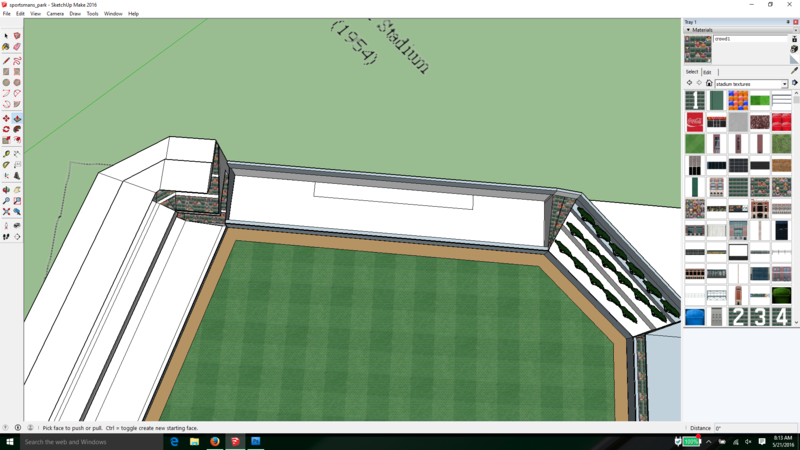 use push pull to pull it up and the unhide the crowd and everything else 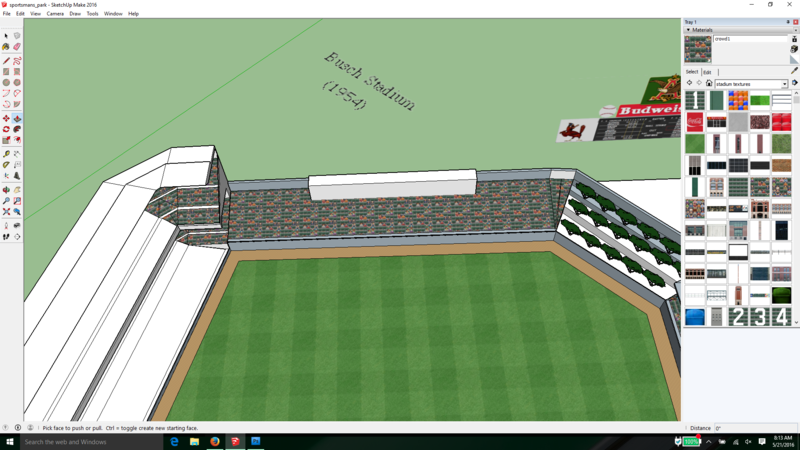 now File -> Import and import the picture of the scoreboard as an image you will need to place it at the bottom left of the box you made and drag it to the other end of the box once this is done, highlight the picture by clicking on the top and then move it off of the box temporarily 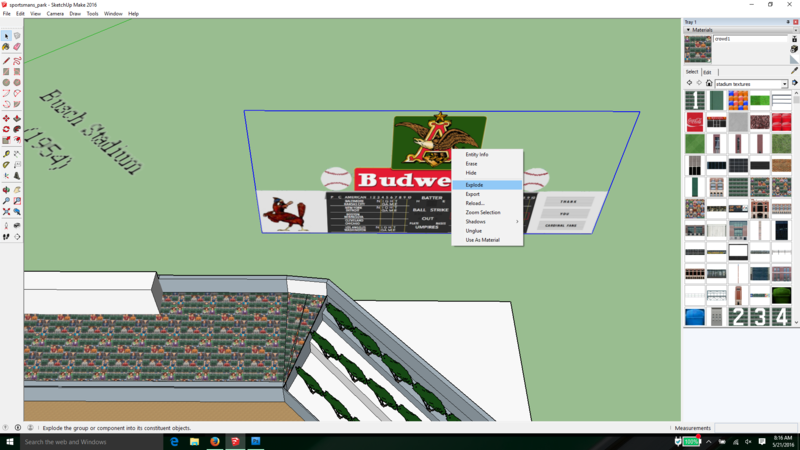 now right click on the picture and select "explode" this will turn the image into a texture. this needs to be done because OOTP handles this better. move the image back over the box 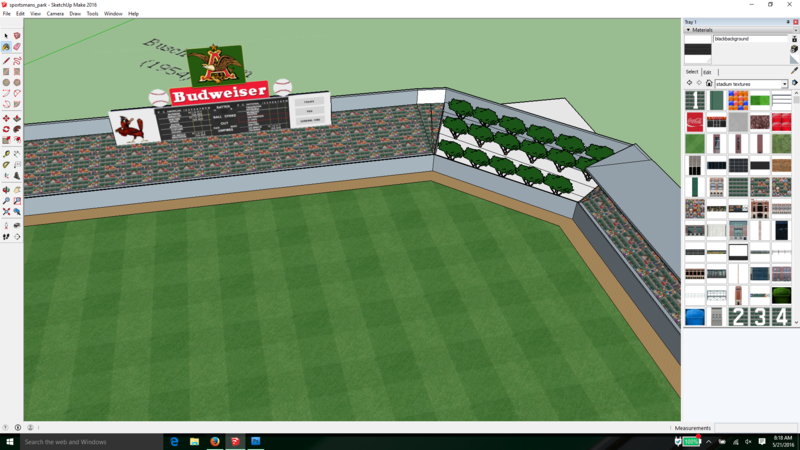
__________________
Senior "Nancy Boy" of the OOTP Boards _______________________________________________ |
|
|

|
|
|
#26 |
|
All Star Starter
Join Date: Apr 2012
Location: Pennsylvania
Posts: 1,873
|
This is really cool watching you build this. I can understand why you are working hard and at a very fast pace. You're up against time. Thanks for the show. Get some rest, now. lol
By the way, I have a real picture of that scoreboard if you want it. Last edited by zappa1; 05-21-2016 at 08:59 AM. |
|
|

|
|
|
#27 |
|
Hall Of Famer
Join Date: Apr 2004
Location: Dedham, MA
Posts: 9,746
|
I went ahead and painted all the faces and even copied some light from a previous model (you can find them on existing 3d warehouse models as well. Thats where I got them)
Next up will be the infied, which I happen to have a model containing different versions I made at the beginning. just copy, paste it in, rotate and adjust the height of the component and then extend the foul lines to the wall. That will all be next (the infields model is up on the 3d Warehouse called "baseball infields" or you can search by me "silvam1441" 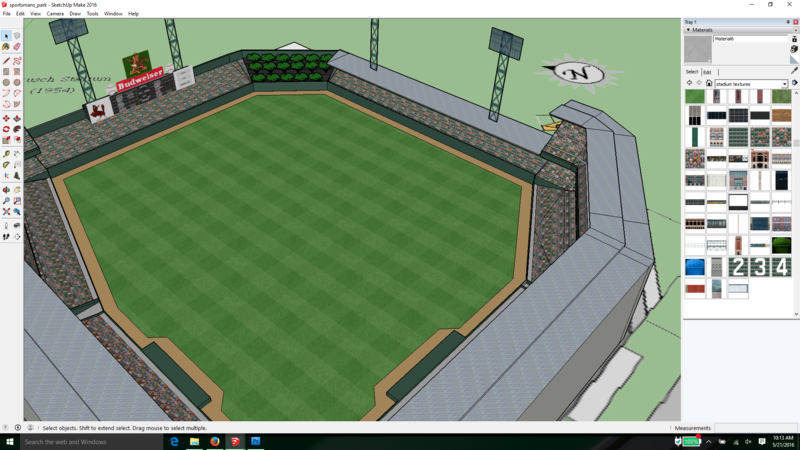
__________________
Senior "Nancy Boy" of the OOTP Boards _______________________________________________ Last edited by silvam14; 05-21-2016 at 10:19 AM. |
|
|

|
|
|
#28 |
|
All Star Starter
Join Date: Apr 2012
Location: Pennsylvania
Posts: 1,873
|
Just checked the system requirements for sketchup. I'm out of luck as I'm still using Vista. Yep. Believe it or not.
 I've been checking into getting a new PC, but that won't happen until I get my rent rebate. A few months away, yet. I've been checking into getting a new PC, but that won't happen until I get my rent rebate. A few months away, yet.
|
|
|

|
|
|
#30 |
|
Hall Of Famer
Join Date: Apr 2004
Location: Dedham, MA
Posts: 9,746
|
I don't know. Honestly. The one I did the demo is pretty easy actually
Sent from my iPhone using Tapatalk
__________________
Senior "Nancy Boy" of the OOTP Boards _______________________________________________ |
|
|

|
|
|
#31 | |
|
Hall Of Famer
Join Date: Apr 2004
Location: Dedham, MA
Posts: 9,746
|
Quote:
Actually. You could try Jarry Park. I haven't done it and it looks easy
__________________
Senior "Nancy Boy" of the OOTP Boards _______________________________________________ |
|
|
|

|
|
|
#32 |
|
All Star Starter
|
|
|
|

|
|
|
#33 |
|
Hall Of Famer
Join Date: Apr 2004
Location: Dedham, MA
Posts: 9,746
|
Sure thing
Sent from my iPhone using Tapatalk
__________________
Senior "Nancy Boy" of the OOTP Boards _______________________________________________ |
|
|

|
|
|
#34 |
|
Hall Of Famer
Join Date: Apr 2004
Location: Dedham, MA
Posts: 9,746
|
I hope this quasi demo has maybe taken the fear factor out of trying for others
Sent from my iPhone using Tapatalk
__________________
Senior "Nancy Boy" of the OOTP Boards _______________________________________________ |
|
|

|
|
|
#35 |
|
All Star Starter
Join Date: Sep 2015
Location: Kelowna, British Columbia
Posts: 1,266
|
Very well done. Thanks.
|
|
|

|
|
|
#36 |
|
Hall Of Famer
Join Date: Apr 2004
Location: Dedham, MA
Posts: 9,746
|
quicj step here:
IT is vital to line up your home plate to the origin of the green/red/blue axes. you do that by unhiding the infield to expose the diagram then zoom out and select the whole model 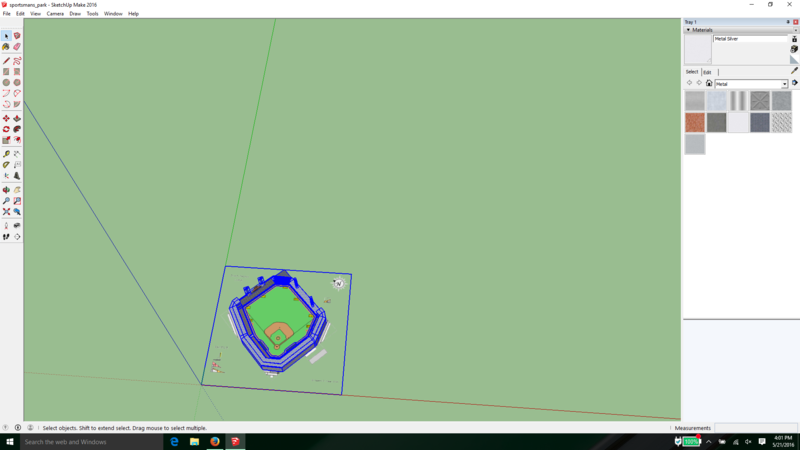 From there, you want to use the move tool and move the point of home plate to the orgin point 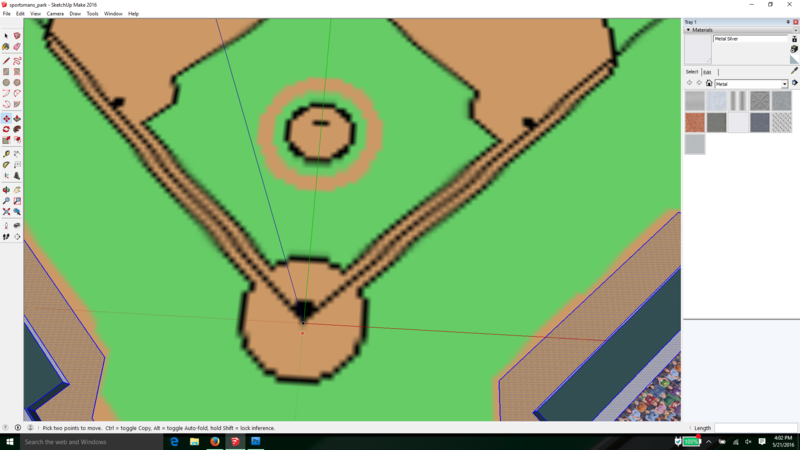 After that use the rotate tool from the origin and then simply rotate the model about 45 degrees until the green axes lines up exactly with the 3rd base line and the red axis lines up with the first base line 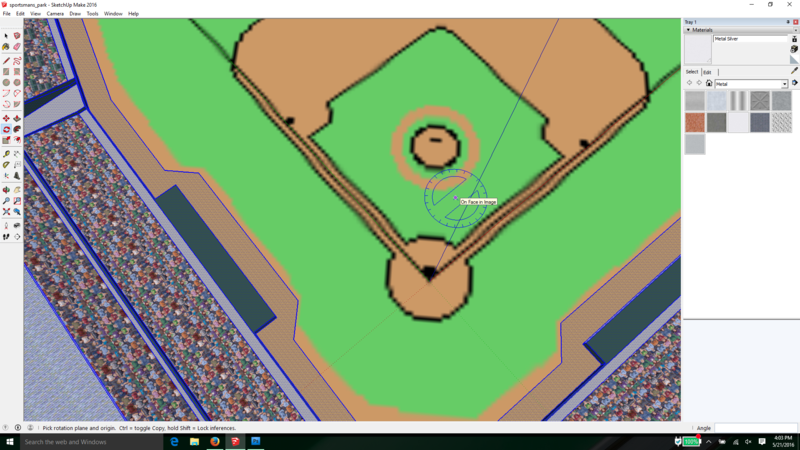
__________________
Senior "Nancy Boy" of the OOTP Boards _______________________________________________ |
|
|

|
|
|
#37 |
|
Hall Of Famer
Join Date: Apr 2004
Location: Dedham, MA
Posts: 9,746
|
now to put the infied in the park.
simply download my infields model from 3d warehouse and select which one you like 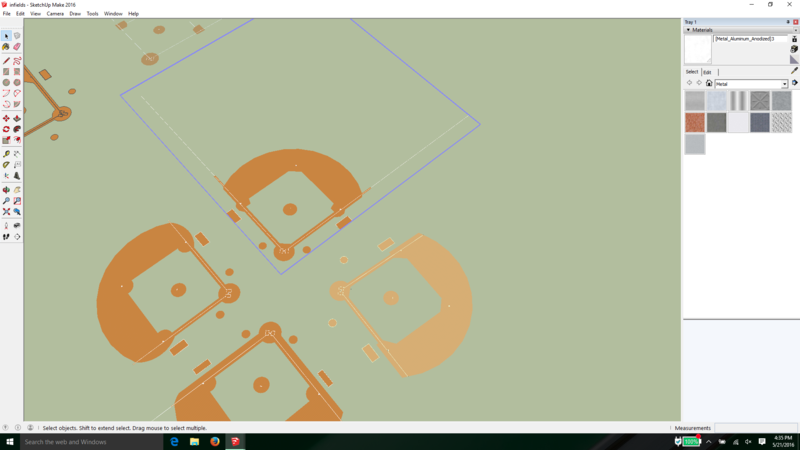 copy the infield and paste it in the new model and move it somewhere close to the origin of axes 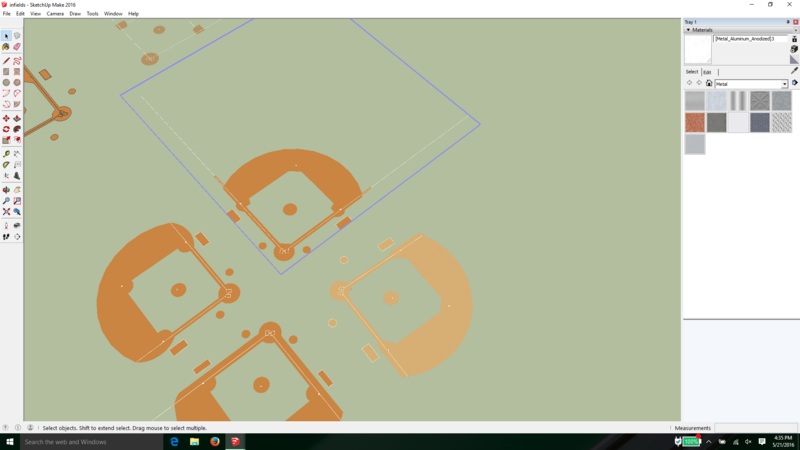 once you get the point of home plate on the origin, time to rotate it so that the axes line up with the baselines once that is done, you can extend the foul line to the walls by using the pen tool and drawing a long rectangle to the base of the wall. 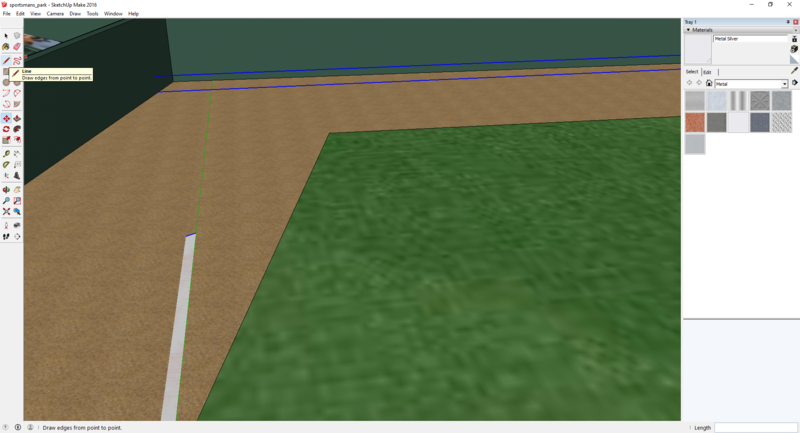 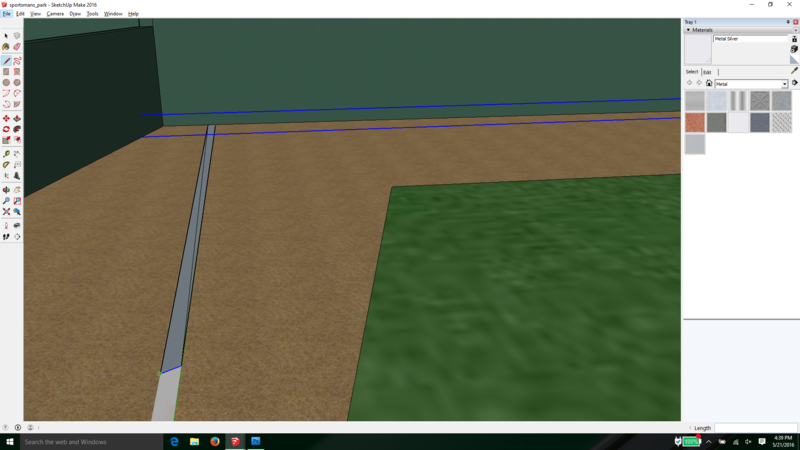 then draw the foul line on the wall using the pen tool. you can us the eydropper tool to copy the texture from the existing fould like and paint both sides of the foul lines and the one on the wall 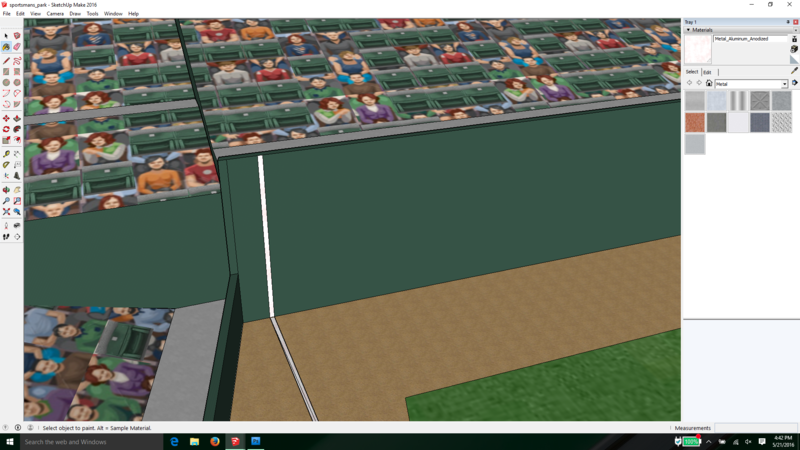
__________________
Senior "Nancy Boy" of the OOTP Boards _______________________________________________ |
|
|

|
|
|
#38 |
|
Hall Of Famer
Join Date: Apr 2004
Location: Dedham, MA
Posts: 9,746
|
next up: The foul poles
__________________
Senior "Nancy Boy" of the OOTP Boards _______________________________________________ |
|
|

|
|
|
#39 |
|
All Star Starter
Join Date: Apr 2012
Location: Pennsylvania
Posts: 1,873
|
[QUOTE=silvam14;4039227]I hope this quasi demo has maybe taken the fear factor out of trying for others
Yes. You're doing a great job. Waiting for the next segment. |
|
|

|
|
|
#40 |
|
Hall Of Famer
Join Date: Apr 2004
Location: Dedham, MA
Posts: 9,746
|
Ok, Foul poles, almost done here.
What I do is just copy the foul pole components from previous models. I will upload this model after for anyone who wants to grab stuff from it. Here I am copying from the Astrodome just click on them and the ctrl-click the other one and then CTRL-C to copy 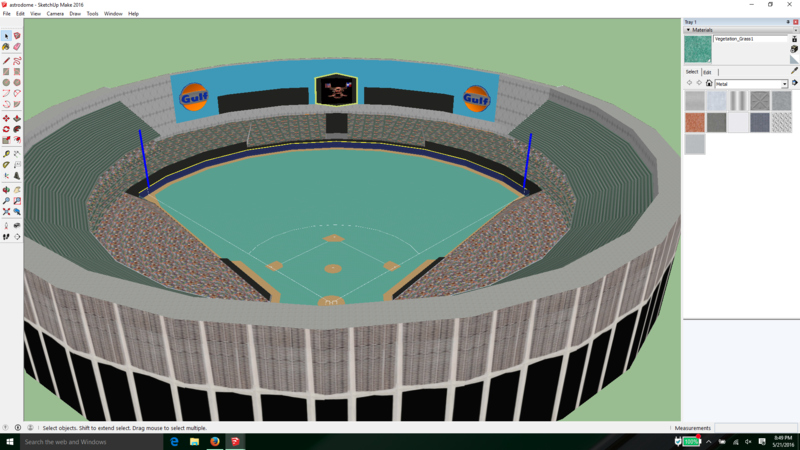 switch back to your new park and CTRL-V when you see them they will be black and you can move them around, just get them close to where they are going and then use the move tool on each one idividually 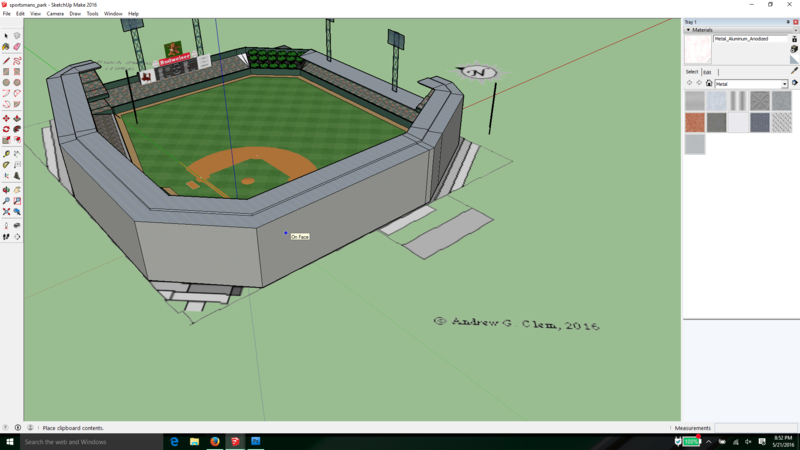 just click on the bottom of one pole and drag it to the top of the fence until it sticks on a line at the foul line 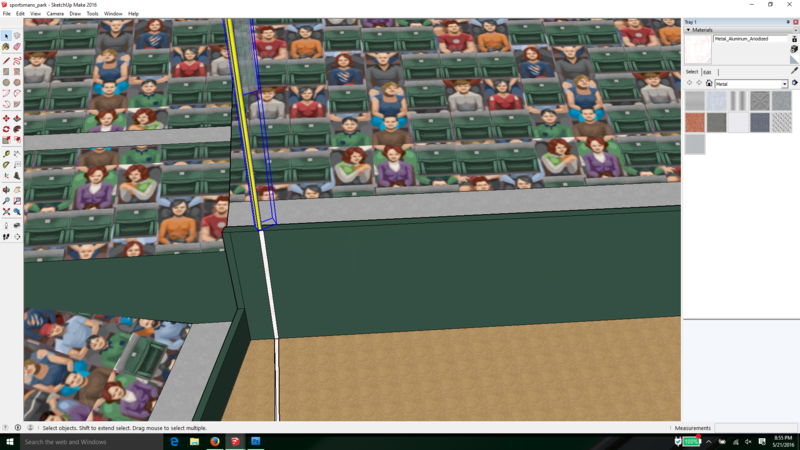 if you are still on the move tool, you can hover over the top of the foul pole and you can rotate it if needed by hovering over one of the red crosses 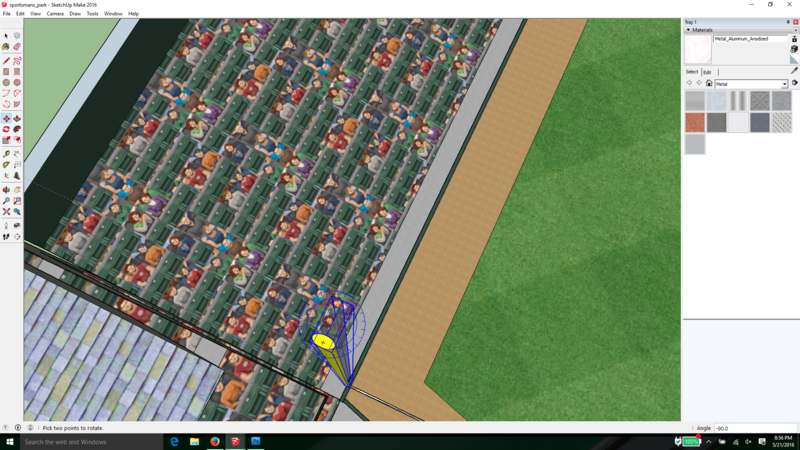
__________________
Senior "Nancy Boy" of the OOTP Boards _______________________________________________ |
|
|

|
 |
| Bookmarks |
|
|